How Do I Build a Railing?
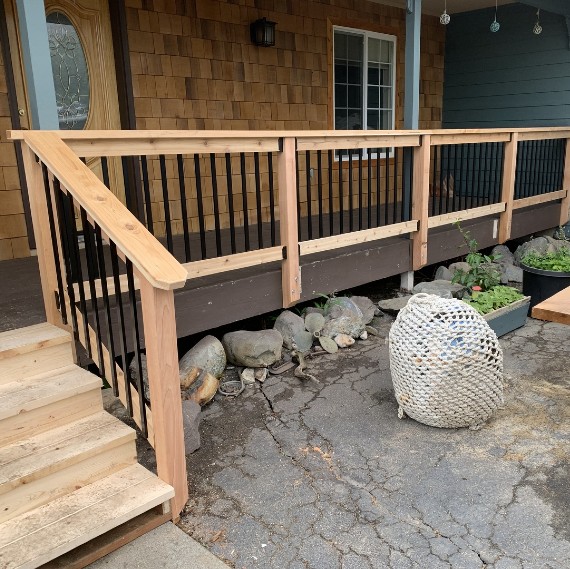
From first-time homeowners spending the weekend DIY building a new deck, to experienced deck builders updating a worn-down deck, knowing how to build a railing setup for your deck, porch, or balcony can protect your family and enhance your outdoor space. Protecting guests, children, and pets from dangerous trips and falls off the structure, a solid metal or wood deck railing system also increases the curb appeal of your home's outdoor living area.
Here are some straightforward and easy step by step DIY installation instructions and learn how to make a railing Be sure to wear protective eye gear, work gloves, and solid footwear to keep your DIY deck rail install smooth and injury-free.
What to Know Before Staring DIY Deck Railing Installation:
- Each state and region have their own unique set of deck building regulations. Be sure to check with your local building office before beginning your deck railing build.
- The majority of states throughout America require a minimum deck railing height of 36 inches from the deck board surface to the top edge of the top deck rail.
- States such as California and Washington generally require a minimum deck railing height of 42 inches from the deck board surface to the top edge of the top rail.
- Railing systems installed on a third-story area or higher typically require a minimum deck railing height of 42 inches, and can often increase up to 48 inches.
How to Build and Install a Deck or Porch Railing
Your outdoor living space needs a strong, solid deck frame before any railing build can go on. Learn more about deck framing and how to install deck support posts in the Decks 101: How to Frame a Deck guide.
1. Measure Your Deck Space and Determine How Many Railing Posts You'll Need
Use a tape measure to find the distance of each straight outside edge of your deck. Then you can begin determining the number of deck railing posts you will need and the post spacing. Plan on mounting deck posts in the two spots closest the house, as well as having posts at outer corners of the space.
If you have outdoor stairs on your deck area, plan on mounting deck posts at the top corners of the exterior stairway.
Deck railing posts are generally spaced 6 feet apart on-center, however, they should not exceed 8 feet apart on-center. Make sure your posts are evenly spaced. If a deck railing posts end up positioned directly above a deck joist, reposition it slightly.
2. Mounting the Railing Posts
Mark with a pencil the mounting locations of the deck railing posts on the deck board surface. Then, check underneath the pressure-treated or composite decking into the deck frame. The area below the post will require at least 4 inches of blocking for the deck post anchor fasteners to drive and anchor into. If there is not this substructure beneath, attach some yourself between the deck joists.
To mount your 4x4 deck post or 6x6 deck post, use a Post Base Anchor or Post Base Kit to firmly and securely attach the post to the deck and substructure. Watch these two quick videos to see how to attach deck posts to the deck surface in minutes.
3. Measure and cut deck rails to fit railing sections
Stretch the tape measure tightly between the center of one railing post, to the other, and note down the distance. With these measurements in hand, mark and trim your 2x4 or 4x4 railing lumber to size. Set the coordinating top and bottom rails side-by-side.
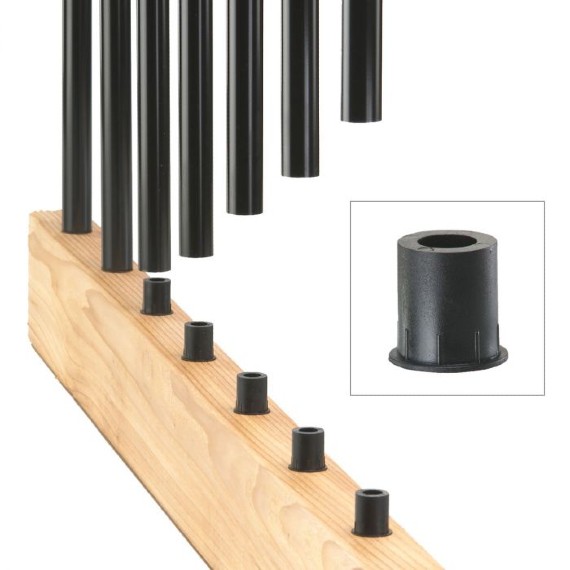
4. Attach deck baluster connectors to the top and bottom rails
Mark the center of the top and bottom rails, and then mark every 4-1/2 inches moving outward from the center of the deck rails. This is the standard spacing for deck balusters throughout the United States as there cannot be an opening of 4 inches anywhere within a railing section.
Continue this method for all top and bottom rail sections for your deck.
On these marks, use a drill to attach baluster connectors securely to the deck railing material.
If you would like a more specific deck baluster spacing to work with your deck's exact measurements, check out our helpful "How to Find Your Baluster Count and Spacing" video below.
5.Attach the bottom rail between deck posts with a deck rail connector
Secure the bottom rail to the posts using a deck rail bracket or a level rail connector. Use two spare pieces of wood to support the bottom rail up to the height you want it to be while attaching.
6. Slide deck balusters over the bottom rail baluster connectors
Push down each baluster to ensure it is seated fully on each connector.
7. Place and attach top deck rail
Starting from one end, feed each deck baluster over its coordinating baluster connector. When finished, lightly tap the top rail down in place via your fist or a rubber mallet.
Inspect the finished railing and secure top rail with two deck rail brackets. For additional support and decor, add a cap rail on top for a finished look.

