What is Joist Tape and Should I Use It:
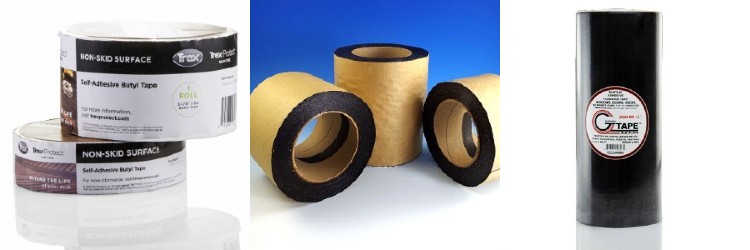
Joist tape works to protect your deck framing and substructure by both creating a waterproof barrier along the areas where rain and condensation tends to pool; as well as protecting the screw holes in the lumber from penetrating moisture. Deck joist tape, also known as flashing tape or butyl tape, can help increase the longevity of your deck's lifespan by upwards of 20 to 30 years simply by applying it directly to the deck joists during new construction or during deck board replacement.
Learn why you should definintely stick flashing tape on your deck checklist in the Decks 101: Joist Tape post. You'll find out more of the benefits, applications, and material types of flashing tape to feel like a pro!
How to Apply Flashing Tape
For best results, attach deck joist tape when the temperature is at least 40° Fahrenheit (5° Celsius).
1. Use a Shop-Vac® or broom to remove any dust, dirt, or debris from the tops of the joists. You'll want the deck frame to be dry and relatively clear from any particles.
2. Take a tape measure to find the length of the rim joist, or the outer joist (learn more in the Deck Framing Guide). Measure and cut a strip of deck flashing tape to the coordinating length plus an additional 1 inch to overlap joist ends.
3. Remove the joist tape backing and beginning at one end of the board, apply the tape to the top of the lumber, pressing firmly and smoothing down the surface of the tape until reaching the opposite end of the joist.
4. At the edges of the joist, cut slits at the corners, and wrap the flashing tape downward over the board. Securely fold the tape over the sides and end of the joist. Continue this process and apply tape to any surface that can hold water: all joists, rim joists, beams, and ledger boards.
Notes on Deck Joist Tape:
- Keeping a utility knife or shears on hand may make cutting the acrylic or butyl flashing tape to an accurate length easier, keeping costs low.
- Some flashing tape such as the Acrylic Flashing G-Tape is tear-by-hand capable, however, many other brands will require a cutting device.
- Work slowly down the joists (beams, ledger boards, etc.) as many brands of deck joist tape cannot be repositioned once attached. Slow and steady wins the race and ensures a watertight seal.
- Some flashing tape such as the Acrylic Flashing G-Tape can be lifted and repositioned after attachment without any adhesion loss. It can also be removed from itself with zero adhesion loss!
- Only use one layer of flashing tape per framing component. While overlapping ends of flashing strips is okay, applying two complete layers won't increase the watertight barrier, however, it will increase your overall cost. Keep it simple!


