Key-Link Vertical Cable Railing Installation
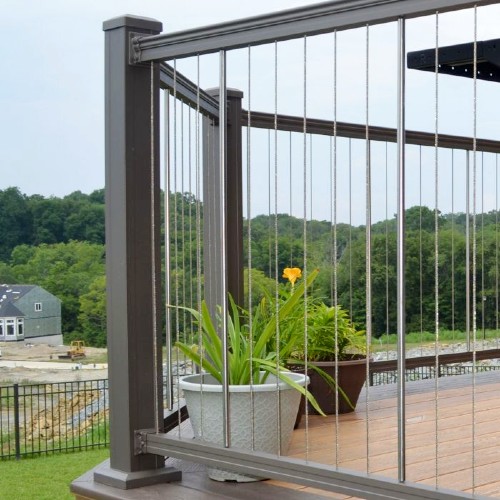
Give your outdoor space a burst of strength combined with stunning sleek looks in the easy-to-install Key-Link Vertical Cable railing system.
Sleek, innovative, and a quick overall project, the Key-Link Vertical Cable rail can enhance the overall ambiance and atmosphere of your home's entire outdoor living space in just an afternoon.
How to Install Key-Link Vertical Cable
Go from DIY deck builder to absolute pro with just an easy deck renovation and upgrade with the contemporary design and style of the Key-Link Vertical Cable line.
Watch this quick and helpful video to find out how to install the Key-Link Vertical Cable Railing system:
Read through the easy installation steps for Key-Link Vertical Cable below!
Attach the Key-Link Metal Deck Posts
Set your Key-Link posts in position according to your deck railing layout and place the included leveling plate underneath the base plate. Partially drive in the four structural screws through the base plate openings and then use a 3/16 inch Allen wrench to turn set screws until the post is plumb. Once in place, fully drive in the structural screws.
Prep the Vertical Cable Railing Section
Remove the Key-Link Vertical Cable Rail Kit from the box, and unwind the rails away from itself until you can lay the section flat on the ground. Gently pull the top and bottom rails tightly to each end of the cables.
Find the Post-to-Post Distance
Use a tape measure to find the distance between the posts and subtract a quarter-inch from the total length to allow room for the brackets. If trimming the section is necessary, be sure to cut evenly from both sides of the rails to keep spacing even.
Also, be careful not to trim any closer than a half-inch on either side of the cable to avoid cutting the cable fittings in both the top and bottom rails.
Stainless Steel Support Rods
Determine the number and position of the stainless steel support rods per the length of your railing section, then cut the cable in the middle, and remove the unnecessary cables from each rail end and insert the support rod into the now empty holes.
Place all included Flange Nuts on the cable ends, and then use your hands alone to tighten the nuts of the cables on either side of the support rod. Don’t tighten any other cables.
Attach Railing to Posts with Included Mounting Brackets
Slide the mounting brackets on the top and bottom rails and let sit loosely. Set two 2-½ inch tall spare pieces of wood between posts and set the railing section onto the blocks.
Confirm that top rail is at the correct height from the deck surface and then using the self-centering lines on the post, attach the bracket to post using included flat-head screws. Then use included pan-head screws to connect the bracket and rail. Repeat this step for all four brackets in the section.
Install the Key-Link Post Skirt and Post Cap
On each post, use a rubber mallet or your fist to gently post cap in place. Then, attach the two-piece post skirt in position around the baseplate of the post.
Tension the Cable Runs
The last piece is to tension the cables, which is really simple, but must follow a certain pattern. Use a 7/16 inch socket to rotate the hardware within the rail while using Cable Gripping Pliers to hold the cable itself from moving. Begin with the cable closest cable to a post, tension the cable until reaching your desired level or the recommended one hundred pounds of tension.
Use the Cable Tension Gauge to check building code compliance. Then move to the cable on the opposite end of the section closest to the other post and tension similarly. Work from side to side tensioning the cables closest to support rods, then gradually move inward until reaching the center of the section.
Shop Key-Link Vertical
