


The Easy Blueprint For Planning A Complete Key-Link Horizontal Cable Deck Railing
If you're looking to turn your deck into an eye-poppingly luxurious space, there's no better choice than Key-Link's brilliant horizontal cable railing system. With top-quality craftsmanship, Key-Link Horizontal Cable Railing creates a space that's gorgeous and modern, while opening up the best deck views you can imagine.
If that's your deck goal, DecksDirect is here to get you there. Check out our guide to get all the right parts and pieces you need for a Key-Link system on your deck. For even more personalized planning help, give us a call at 1-888-824-5316.

Key-Link Horizontal Cable Railing Shopping Checklist
- Step 1: Posts & Post Trim
- Step 2: Rail Kits
- Step 3: Cable
- Step 4: Tools You Need To Install Key-Link Cable Railing
More Planning Help
- Angled Railing Connections
- Cutting One Section Into Two
- How To Measure For Your Railing
- How To Cut Key-Link Railing
- Using Existing Wood Posts
- Optional Upgrades:
- Free Planning Help
Planning Your Deck Project
The first step to planning your new railing is measuring your space. Draw a simple diagram showing the shape of your deck, then measure each dimension and label it. From there, we'll help you create your Key-Link shopping list, starting with posts and moving to rails, cable, and installation tools.
Below, we'll run through how to plan for the most common features we see on decks across the country: level sections, deck stairs, standard 90-degree corners, and some unique angled connections.

If your deck has any especially unique dimensions, you can always give us a call. We staff a team of experienced deck project planners who help plan hundreds of deck projects each year. Trust us: we've seen some quirky decks, and no matter how unique your space, we can help you plan a code-compliant railing to fit. Give us a call at 1-888-824-5316 for totally personalized project planning!

Step 1: Pick Your Posts & Post Trim
- Key-Link Posts
- Key-Link Post Caps
- Key-Link Post Skirts
We recommend starting with posts, which will set the framework for the rest of your railing. Key-Link Horizontal Cable Railing comes in 6-foot and 8-foot lengths that can be cut down to fit shorter distances. For the longer sides of your deck, divide the area into roughly 6- or 8-foot sections with posts in between. For sections shorter than 8 feet, you'll only need one post on each end.
Key-Link railing is expertly designed to allow cables to run through posts into the next section of railing - even at corners. That's because the system comes with specialized posts depending on which direction you need the cable to run. Here's a rundown of the specialized posts you'll need for five various points on your deck:
1. For A Straight Connection Between Two Level Railing Sections
The most basic connection is a straight run between two (or more) level railing sections. The cable runs straight through the post, as you can see below:

For this type of connection, all you need is Key-Link's Pre-Drilled Line Post. The post comes with small holes already drilled to allow your cable to run straight through. Because the cable doesn't turn on either side of the post, there's no need for Key-Link's fittings like some of the posts we'll hit below.

Note: For a 36-inch railing, use the 38-inch post. For a 42-inch railing, use the 44-inch post. The other sizes are designed for stair railings.
Shop Pre-Drilled Line Post2. For A Straight Connection Between Two Stair Railing Sections
If you're connecting two stair railing sections in a straight line, you'll need very similar posts with pre-drilled holes and no fittings. Key-Link makes specialized pre-drilled posts for stair sections, with the holes drilled at an angle to allow the cable to run downwards:

You'll buy these posts on the same page as the level rail posts - just select the correct height to get the specialized stair posts. Key-Link designed the 40-inch and 46-inch posts to work with stair sections and the 38-inch and 44-inch posts to work with level sections.
Note: For a 36-inch railing, use the 40-inch post. For a 42-inch railing, use the 46-inch post. The other sizes are designed for level railings.
Shop Pre-Drilled Line Post3. For A Straight Connection Between A Level Section And A Stair Section
At the top of your deck stairs, you'll need a post to combine a level section (on top of your deck) with a stair section (going down your deck stairs). For this, use Key-Link's Line Post With Fittings:

The built-in fittings allow the cable to bend downwards into the stairs without rubbing against the metal post and compromising the strength of your cable. The line post option is for straight connections like these. The next two sections will run through the other options for posts with fittings (corner posts and end posts).

4. For A 90-Degree Corner Of Any Kind
To turn your cable run at your deck's corners, use Key-Link's specialized Corner Post With Fittings.
_web.jpg "Corner Post On Key-Link Cable")
The corner post features fittings on adjacent sides of the post:

Inside the post, tubes guide the cable gently into a 90-degree turn, coming out the other side:

These posts work for level corners, but also work if you need a 90-degree turn to start your stairs. The fittings allow the cable to turn 90 degrees and bend downwards into your stairs at the same time.
Shop Corner Posts With Fittings5. For The Ends Of Your Deck Railing
At the ends of your deck railing, you'll need to finally cut off or "terminate" your cable runs. Key-Link's specially-made End Post With Fittings is designed to hold the end of your cable run tightly in place:

Don't Forget Post Trim
You'll need two more pieces for each post for a completed, polished look: post caps and post sleeves.
Post caps sit on top of your post, covering the hollow interior of the post and adding style at the same time. Below is the basic post cap, though you can also liven up your space with more decorative lighted post caps (jump to lighting).

At the bottom of your post, a post skirt gives a completed look and hides the hardware attaching your post to your deck.
Key-Link's post skirts come in two pieces that snap easily together around your post, so you can attach them even if you're already started running your cables.

Step 2: Add Level And Stair Rail Kits
Once you've planned your post, the next step is getting the rails that run between them. Luckily, Key-Link rails come in handy kits that include the top rail, mounting brackets and the hardware to attach the rails to your posts, plus intermediate balusters that keep your cables in place across long railing sections.
Key-Link's horizontal cable railing does not use a bottom rail, which means less parts to install - plus a better deck view with less metal in between you and the natural beauty beyond.
Level Rail Kits

For level sections, the level rail kit will cover everything you need between your posts, minus the cable (which we'll hit in our next step).

Stair Rail Kits

Stair rail kits also include everything you need, including special brackets to attach your rails at an angle. (You can cut the top rail itself to a custom angle to fit the exact slope of your deck stairs).

As with the level rail sections, very short runs won't need intermediate balusters, but longer runs do need the balusters, which come included in the rail kit. You can see an intermediate baluster in the longer stair section below. It's the vertical metal piece in the middle of the two larger posts.

Step 3: Calculate The Cable You Need
Posts: check. Rails: check. Now it's time to get the cable to run inside it all. The cable will come in one long spool, which you can cut into individual runs to fit your railing setup.

If you're using a 36-inch-high Key-Link Railing, you'll have 11 total cable runs in each section. For a 42-inch-tall railing, there will be 13 cable runs. To determine the total length of cable you need, measure the total length of all your railing sections combined. Multiply that number by 11 or by 13, depending on the height of your railing.
For example, if your deck has 50 feet of railing, you'd take 50 times 11 (for a 36-inch tall railing) to get 550 total feet of cable needed. Always round up from there to allow for some lost cable during cutting and installing. Cable comes in spools of 100 feet, 250 feet and 500 feet, so you could order a 500-foot roll and a 100-foot roll to have enough for your project.
If you don't want to do the math yourself, or just want a second set of eyes on your plan, give us a call at 1-888-824-5316. We'd be happy to make sure you get everything you need in one order so you don't have to pause your project and order more cable.
Shop Stainless Steel CableStep 4: Get The Tools You Need To Install Your Cable Railing
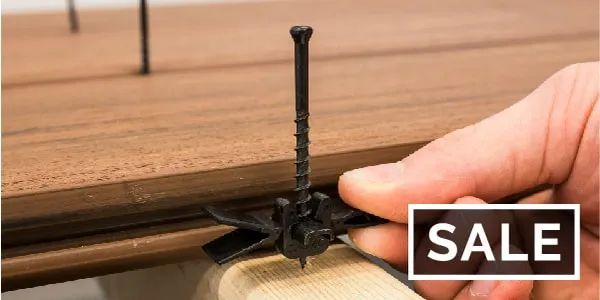
- Structural Screws To Mount Your Posts
- Cable Cutter
- Tension Gauge
- Cable Gripping Pliers
- Cable Release Tool
- Cable Threading Needle
- Touch-Up Paint
Cable railing is a completely unique look - but it also takes some specialized tools to install. Here are the other parts and tools you'll need to complete your Key-Link Horizontal Cable Railing installation:
Structural Screws For Mounting Posts

Your rail kits come with all the hardware you need to attach rails to posts. But to attach your posts themselves to your deck surface, you'll need strong structural screws that are at least 4 inches long. We recommend the GRK Pheinox™ RSS™ Rugged Screws. They're compatible with wood, pressure-treated, composite, and PVC decking.
Cable Cutter

You'll need to cut your long spool of cable down into smaller sections. The Key-Link Cable Cutter will create clean cuts easily.
Tension Gauge

As you install your cables, you'll need to make sure there's enough tension to keep the cables tight and up to code. The Cable Tension Gauge from Key-Link will help you get the proper amount of tension in your cables.
Cable Gripping Pliers

As you finish a cable run, you'll need to pull the entire length of cable taught in order to insert the cable into the end post's fitting. The Cable Gripping Pliers are designed specifically to clamp down on the cable without harming, scratching, or mis-shaping your cable.
Cable Release Tool

The end fittings are designed to keep your cable locked in - but if you accidentally insert a cable into the wrong spot or leave too much slack in your cable, you won't be able to pull or twist the cable out to refit it.
Instead of wasting a fitting and an entire run of cable, then waiting for a new order of cable to arrive, add a Cable Release Tool to your order. You can easily release your cable from a fitting if needed. It's not a requirement, but it's a small addition to your project that could save you a tremendous amount of time and frustration.
Cable Threading Needle

It can be tricky to feed cable all the way through the pre-drilled holes in your posts. This Cable Threading Needle is designed to help speed up your installation and save you the frustration of trying to get your cable to come out the right spot on the other side of the post.
Touch-Up Paint

There are two good reasons you'll need touch-up paint for your installation. First, anytime you cut a post or rail to a smaller size, you'll expose some aluminum that isn't covered by Key-Link's tough powder-coating. Touch-up paint will cover those spots and protect them from corrosion.
Second, if your posts or rails get any nicks or scrapes while you install them, touch-up paint will allow you to make them look as good as new again. Key-Link's paint is an exact match for the color and texture of your rails, and comes in any of Key-Link's three color options (textured black, textured bronze, or textured white).
Special Applications
We've covered the most common applications of Key-Link railing. Now for a few special cases we see fairly often. If your question isn't listed, please give us a call at 1-888-824-5316 and we'd be happy to help you out!
Everything You Need For An Angled Connection On Your Key-Link Railing
- Level or Stair Rail Kit
- Key-Link Line Post With Fittings
- Swivel Brackets
- Bracket Wedge (for larger angles)

Most decks are square or rectangular, with right angles at the corners. But many decks mix in unique angles like the cutout corners shown below.

Fortunately, Key-Link Horizontal Cable makes it easy to accommodate these unique angles. You can use the exact same level or stair rail kits we showed above - just cut them to the angle you need using a miter saw with a metal-cutting blade.
You'll also need a set of swivel brackets, as shown below. Swivel brackets come in both stair and level options.

Key-Link's swivel brackets will cover angles up to 40 degrees for level sections or 30 degrees for stair sections. If you need sharper angles than that, you can add 5 degrees to your angles with the Key-Link bracket wedge.

As for posts, use Key-Link's Line Post with Fittings. That allows your cable to bend to the angle you need.
Can I Cut Down One Key-Link Horizontal Cable Railing Section Into Two Smaller Sections?
Yes! If you have shorter sections of railing, you can often save money by buying one long rail kit and cutting it down into two smaller sections.
A few things to keep in mind if you plan to cut a longer section down into two shorter sections:
You'll need an extra set of brackets. Each rail kit only comes with enough brackets to fit a single rail section. So if you're cutting one rail kit into two, you'll need to buy an extra set of rail brackets, as shown below:

You may need additional intermediate balusters. Every railing section longer than three feet needs an intermediate baluster to keep the cables tensioned. Sections longer than six feet will need two intermediate balusters. You can see a long section with two intermediate balusters (the vertical black pieces between the wall and the corner post) below:

6-foot and 8-foot rail kits come with the right number of intermediate balusters, but if you're cutting a section down, make sure you'll have enough balusters to cover your space. As always, our team can help with this!
Allow for some lost length during cutting. Make sure to buy a longer rail section long enough to cover both of your shorter stretches with some extra length, because you may lose some material as you cut.
Include touch-up paint to cover your cut ends. Key-Link railing is powder-coated to protect from corrosion. When you cut a rail, you'll expose some of the underlying aluminum. Fortunately, a quick coating of touch-up paint will cover that surface and protect your railing from corroding in the elements.
How To Measure Your Deck For Key-Link Horizontal Cable Railing Sections
Key-Link's 6-foot and 8-foot sections are all "true" dimensions. That means a 6-foot rail kit features a top rail that is a full six feet long. (Many other railing systems use "on-center" measurements which measure from the center of one post to the center of the next post). Keep in mind that when you install the railing, the posts at the end of each section will actually make the railing section longer than six feet.
Typically, you'll have to cut down your rails to fit your space. That's easy to do - we'll run through it below:
How To Cut Key-Link Horizontal Cable Railing
Key-Link's powder-coated railings are strong and sturdy,, yet easy to cut with the right tools. Use a miter saw with a fine-toothed blade that's approved to cut aluminum and you'll be able to trim down your rails to fit the perfect dimensions of your space.
When you cut your rails, you do expose some of the underlying aluminum that isn't protected by Key-Link's premium powder-coating. You'll want to coat those cut ends in Key-Link Touch-Up Paint to protect them from the elements.
What If I Want To Use My Existing Wood Posts?
If your deck already has wood posts in place, you're in luck: you can install the Key-Link Horizontal Cable Railing system in place around your existing wood posts.
You'll buy rail kits as usual, installing the included brackets onto your wood posts and mounting Key-Link's metal top rail between your wood posts. For the cable runs, use the Key-Link's Lag Cable Connectors, which drill directly into your wood posts with the threaded end and house the cable in the other end:

For the rest of your posts, drill holes all the way through and run the cable straight through your posts and into the next section. The rail kit will come with intermediate balusters you can use just like you would on a system with metal posts.
Shop Lag Cable ConnectorOptional Upgrades:
Key-Link Horizontal Cable provides a beautiful backdrop for your deck - but if you really want to take things to the next level, here are our favorite optional upgrades you can make now or a few years down the road.
(If you want to be prepared for these upgrades down the line, give us a call at 1-888-824-5316 and we'll help you plan your setup so that you can easily add these upgrades in the future.)
Key-Link Drink Rail Brackets
A drink rail is a beautiful way to add more functional space to your deck. You can use the deck board of your choice as the rail itself, tying your decking and railing together stylistically.

With the Key-Link system, adding a drink rail only requires a special bracket that leaves the top of the rail free for mounting the board:

Key-Link Lighting
Lighting is the cherry on top of an amazing deck. With Key-Link railing, you get your choice of multiple lighted post caps that perfectly match any of Key-Link's colors. You can choose these instead of the basic post caps we showed above.
The ornamental post cap light has a ring of illumination all the way around the post cap:

The flat top post cap is a traditional look with light projected downwards to your deck surface.

The pyramid post cap has a decorative pyramid-like point with gentle slopes outward. It also features light directed downwards in a sort of spotlight effect.

Key-Link makes it easy to control your low voltage lighting with a sleek transformer that's designed to install directly onto one of your deck posts, like a futuristic control panel where you can dim your lights or set on/off timers to use your lights only when you need them.

You can also add spot lighting on your deck posts. This Key-Link post light installs directly onto a deck post and shines a spotlight downwards to illuminate the edges of your deck. You can also use them on your stairs for safety.

Key-Link's gorgeous, modern look pairs brilliantly with lighting. If you want to remake your deck into a sleek, showstopping environment sure to wow any visitors, pairing Key-Link railing and lighting is the way to go.

