


Table of Contents:
How to Tighten and Tension Your Cable Railing
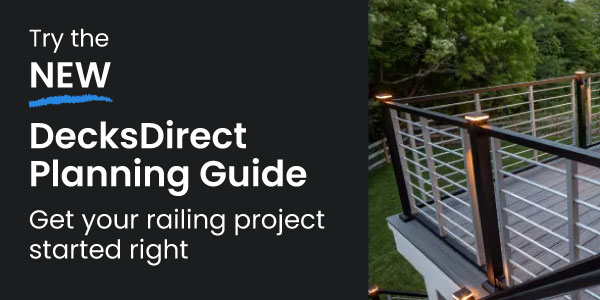
Install a long-lasting cable railing system in just one easy step.
Cable railing systems can help give your space a modern, minimalistic appeal whether you're installing them around your deck perimeter or interior staircase. Whether you're working with your own existing wood deck posts or with a full premium powder-coated aluminum and cable system, cable deck railing setups can add increased security to your home while keeping your backyard views clear and open as well as adding an architectural detail with the thin horizontal lines.
A low-maintenance way to add a high-performance deck railing design to your home and outdoor living space, cable railings simply require a wipe-down with soapy water once or twice a year and a biannual tension check. Each cable railing brand and line has its own cable tensioning sequence to follow for accurate tightening and consistent hold.
When tensioning any cable railings, be careful not to overtighten. The cable can be released from the cable hardware and fittings if tightened beyond the maximum level.
DecksDirect Pro Tip:
Learn how to tension and tighten your cable deck railing system per your manufacturer's cable sequence and recommendation for a one-stop adjustment that lengthens the life of your railing.Skyline Cable Railing:

The Skyline cable railing system combines the high-intensity strength of powder-coated aluminum posts, rails and brackets with stylish stainless steel cable kits for a sleek, deck railing your family and guests are sure to love. With pre-welded base plate bottoms, the Skyline Pre-Drilled Post Kits attach to the deck surface completely prepared for cable install.
Skyline is a simple, straightforward system: just use End Posts at both ends of a cable run with Line Posts in the middle. One End Post uses a threaded stud to secure the cable in place. At the other end post, pull the stainless steel cable through the Pull-Lock fitting.
Return to the post with the threaded stud. Using a 1/8-inch hex wrench, hold the stud in place, then use a 7/16-inch wrench to tighten the locknut and tension your cable. Follow this tensioning sequence, starting from the middle cable and working your way up and down in an alternating pattern.

Key-Link Cable Railing:

Featuring in-post cable railing hardware fittings, pre-drilled cable openings, and self-centering mounting brackets, the Key-Link cable railing system puts convenience first when installing your own stainless steel cable railing line. After positioning and mounting your Key-Link posts simply thread the stainless steel cable lines through the posts and then at least 1-1/4 inch into the face of the End Post Receiver. Once your cable runs all have both ends inserted into the posts, rest your body weight onto each cable to anchor the wires into the fittings.

Key-Link Cable Railing does not require a specific sequence to be tensioned properly, however, we recommend working out from the center run for a consistent feel.
Simply insert a 3/16 inch Allen wrench into the outside face of the fitting and turn the wrench up and away from your body to tighten the cable to the level needed. A pair of Cable Gripping Pliers should be used to prevent the cable from spinning which can prevent the receiver from tightening fully.
Prestige Cable Railing:

Strong but not overpowering, and sleek while still making a statement. Prestige Cable railing brings the delicate and modern look of stainless steel wire railing to the forefront of DIY-friendly installations. Blank posts featuring a pre-welded base plate bottom allow you to create your own unique cable railing design and layout to help your home stand out on the block! Just position and mount your posts, drill the appropriate cable opening sizes, and run your Feeney CableRail Kits for Prestige Railing as the infill.

The Feeney CableRail Kit for Prestige, once installed, will be tensioned by holding the Threaded Terminal fitting with pliers and spinning the included Snug-Grip Washer Nut with a wrench. Feeney recommends beginning to tension with the center run of cable and then alternating cable runs outwards until tensioning the first and last runs of cable.
Refer to the cable chart at the right to ensure you're tightening your cable railings accurately and meeting building code. We recommend a Professional Cable Tension Gauge by Feeney to guarantee building code compliance.
Fortress H-Series Cable Railing:

Fortress H-Series Cable Railing systems come as pre-assembled cable railing panels. That makes it easy and straightforward to trim, mount and install. Simply position and attach your surface-mount FortressCable H-Series Posts, measure and connect your FortressCable H-Series Universal Rail Brackets, set your FortressCable H-Series Panel and enjoy!
Remove your included Mid-Span supports (in the center of the panel) and Vertical Uprights (on the outer sides of the panel), measure your post to post opening, and trim your Fortress H-Series Cable Railing Panels to size. Set your cable railing panel in place and finish connecting to the mounting brackets for a solid look guests will envy.
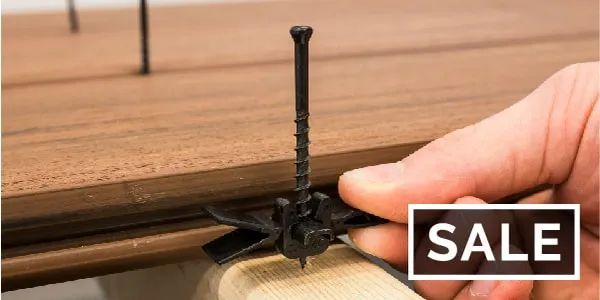
To tighten your FortressCable H-Series Cable Railing runs, remove the Hex Nuts hardware from the adjustable swage and apply pressure to the cable clamp until excess cable is removed. Reassemble the cable clamp and use a 13mm socket wrench to tighten the cables in the sequence below.
We recommend a Professional Cable Tension Gauge by Feeney to confirm that your cable tautness is building code compliant. Fortress recommends that the cable runs be adjusted to 250 lbs. of tension.
