How To Create Strong and Unique Patio Paver Patterns
One of the best ways to totally transform the look of your deck or patio is to resurface it with a distinctive pattern of outdoor pavers. When laying pavers, the possibilities for looks and patterns are nearly endless - so how do you pick the perfect paver pattern for your space and get started?
Below, we'll run through 6 beautiful deck paver patterns you can create in your space, explaining how to set up each one using Aspire Pavers by Brava and the included easy-to-use installation grid.
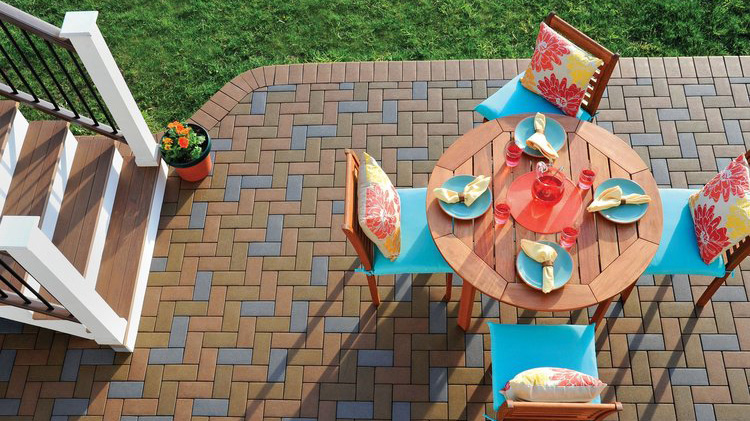
Here are six unique paver patterns you can create in your backyard patio or deck:
- Herringbone
- Basketweave
- Running bond
- Block Lattice
- Soldiered
- Plainweave
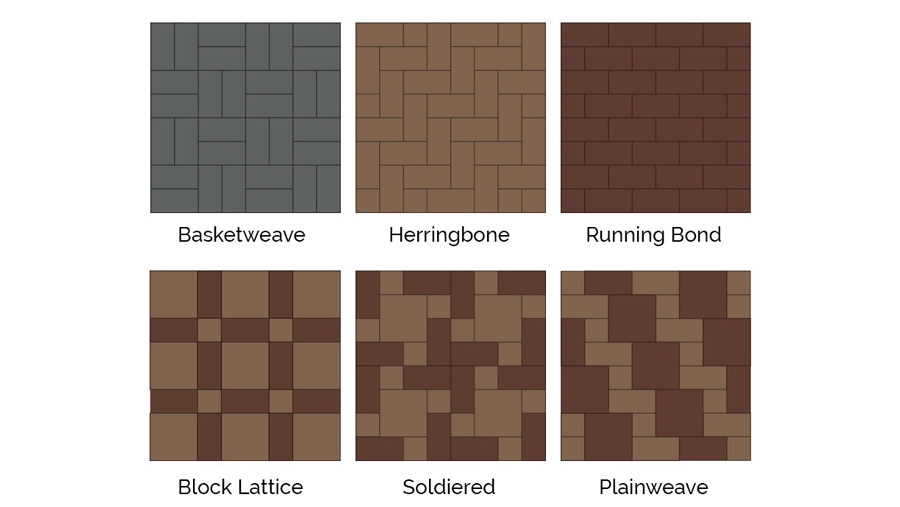
Read on to learn how to create all six!
Table of Contents
- First Things First: Making Sure Pavers Overlap Grids
- Paver Patterns You Can Create:
- Herringbone Pattern
- Basketweave Pattern
- Running Bond Pattern
- Block Lattice Pattern
- Soldiered Pattern
- Plainweave Pattern
- Advanced Techniques For More Unique Designs
Pro Tip: Make Sure Your Paver Laying Patterns Overlap Grids
We'll describe how to create all of the paver patterns below using Aspire Pavers by Brava, which come with an installation grid to keep pavers in place after you've laid them. You could also recreate these patterns with traditional stone pavers, though you'll have to be more careful to keep everything square without the grid to guide your design.
These patterns are all made from a mix of rectangular and square pavers:
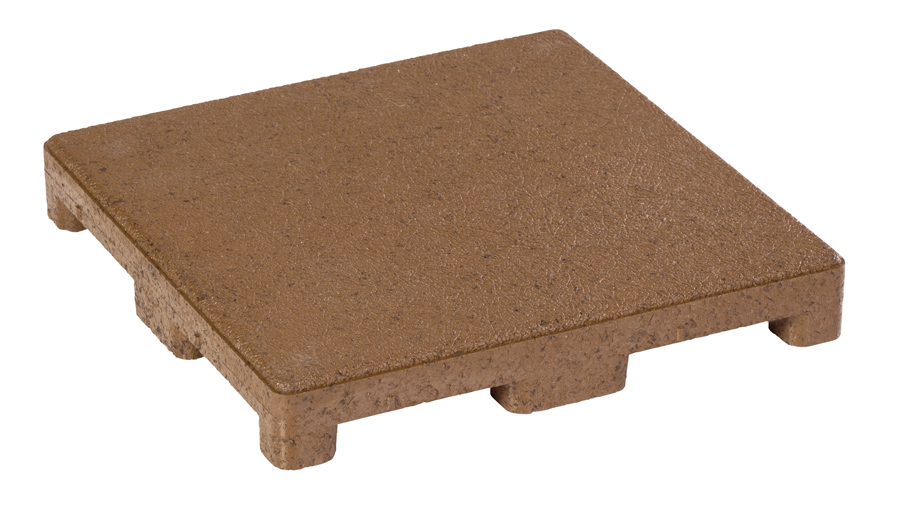
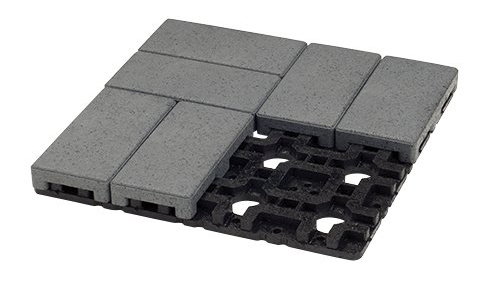
The installation grid is a huge benefit - it keeps pavers from moving or uprooting, and it also keeps your pattern perfectly square and even. That's especially helpful when laying pavers across a large or long space..
The important thing is to make sure your pattern includes pavers that overlap multiple grids, locking them together. This will keep your pavers from slowly sliding apart over time as guests walk across them. All of the patterns below are designed to lock each individual installation grid to the grids around it for maximum strength.
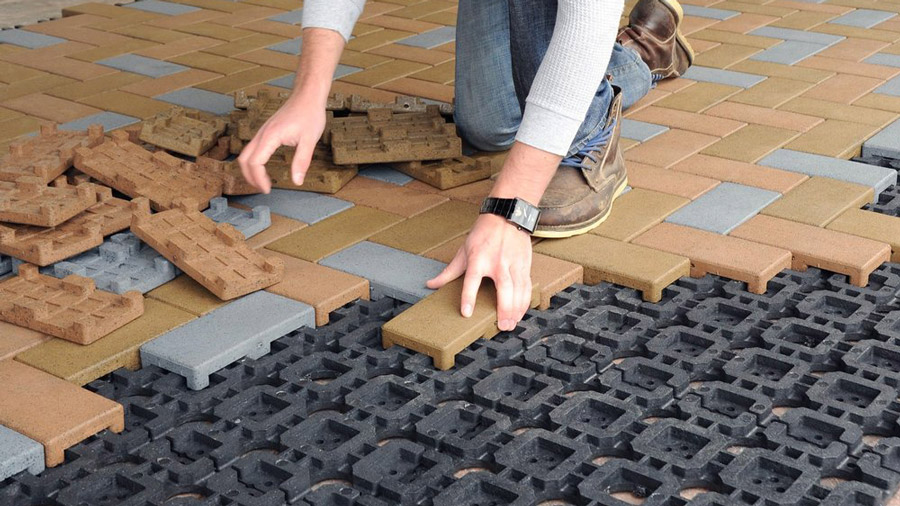
How To Create DIY Patterns For Pavers:
Herringbone Paver Pattern
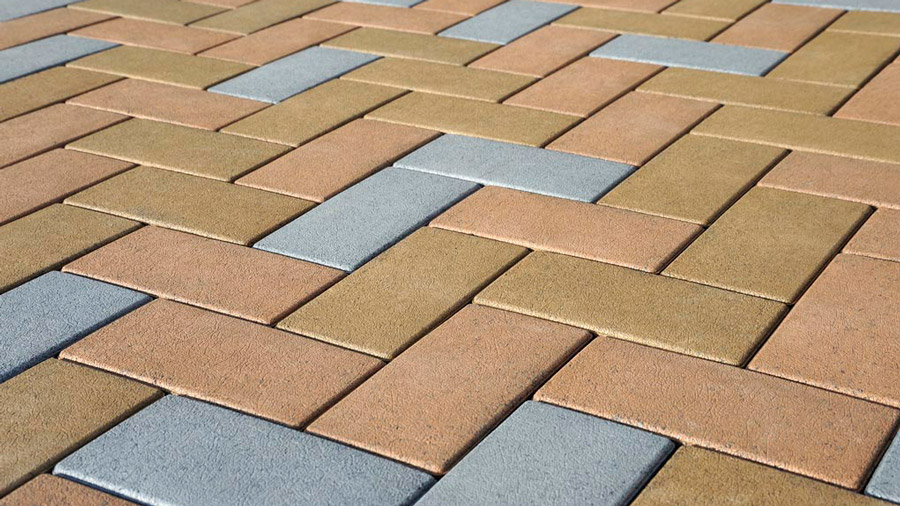
We'll start with one of the most widely-used and versatile patterns: the herringbone.
The herringbone pattern is the strongest paver pattern, with each individual paver held in place by the six different pavers all around it. A herringbone layout will lock all of your underlying grids together and will keep your pavers firmly in place even with heavy foot traffic.
How To Install A Herringbone Pattern
For the herringbone look, install your grids in a square, as shown below. Start at the corner and lay rectangular pavers at right angles:
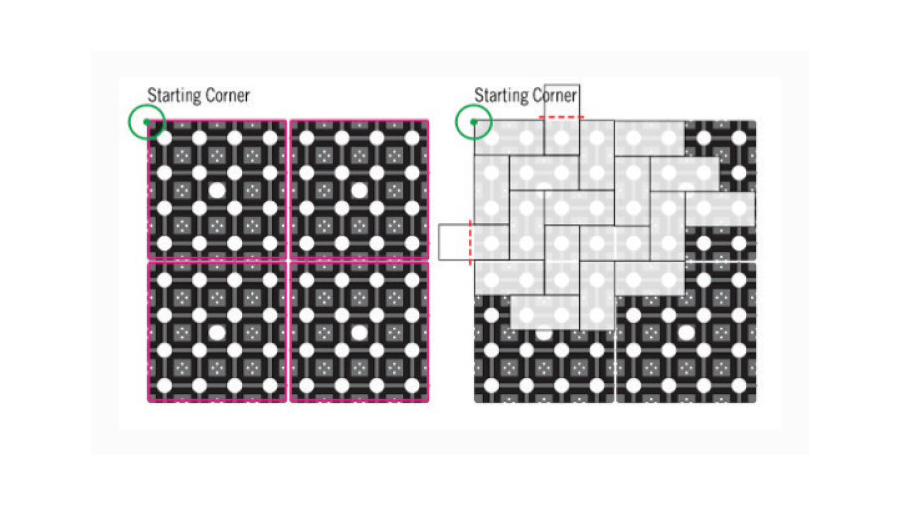
At the edges of your space, you can cut down the pavers that extend beyond the edge of the grid. Across the rest of the space, those pavers will overlap and hold two grids firmly together.
You can mix up colors, as shown in the photo above. But the herringbone pattern also has enough visual appeal on its own to work great with a single color, like the beautiful red deck below:
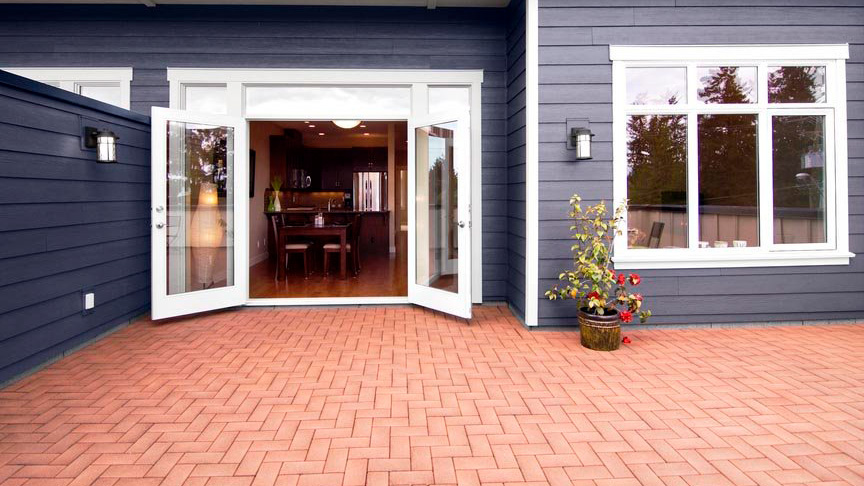
Basketweave Paver Pattern
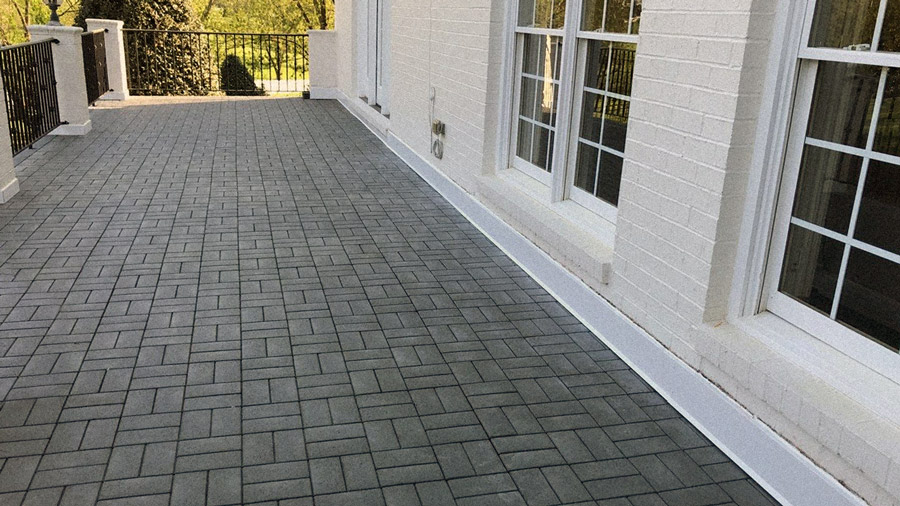
A basketweave pattern preserves lots of long, extended lines to make your space look and feel huge. But by alternating the direction of each set of two tiles, it adds a little more complexity than a typical deck with long individual boards running the same direction.
How To Install A Basketweave Pattern
To make your basketweave pattern work, start by cutting down the first grid you use. Take 4 inches off in both directions, as shown by the dotted lines in the image on the left below:
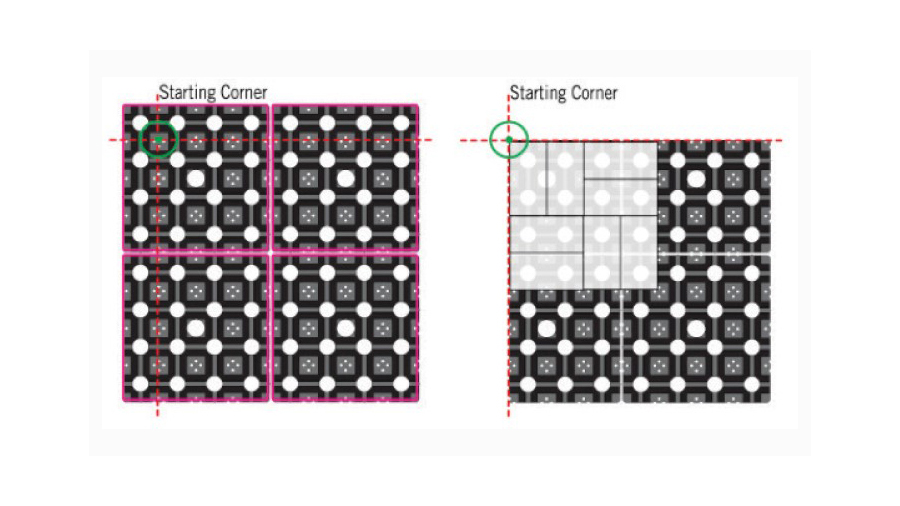
Then, when you lay your first eight tiles, they'll overlap onto the next grid, firmly locking everything together. From there, you can continue your pattern across the rest of the space.
You can create a monochromatic basketweave pattern like the deck above. But you can also alternate colors for a more custom look, like the box-within-a-box scheme below:
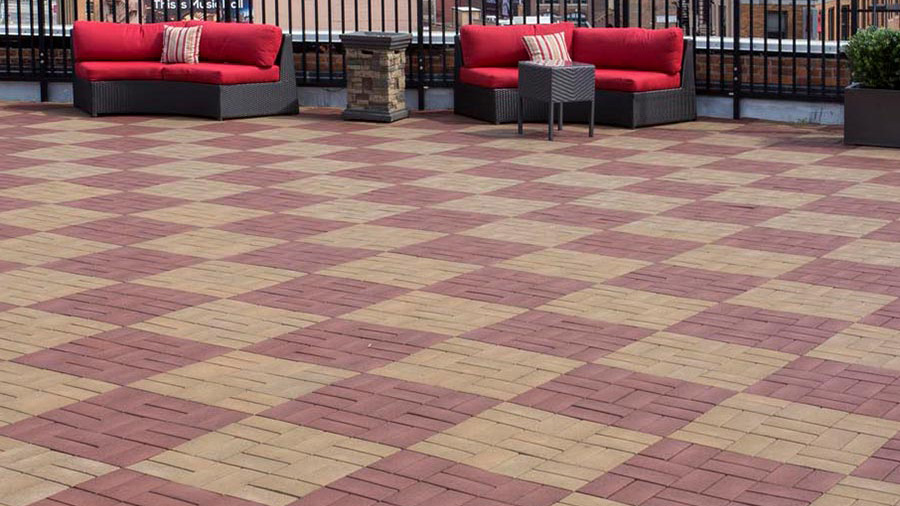
Running Bond Paver Pattern
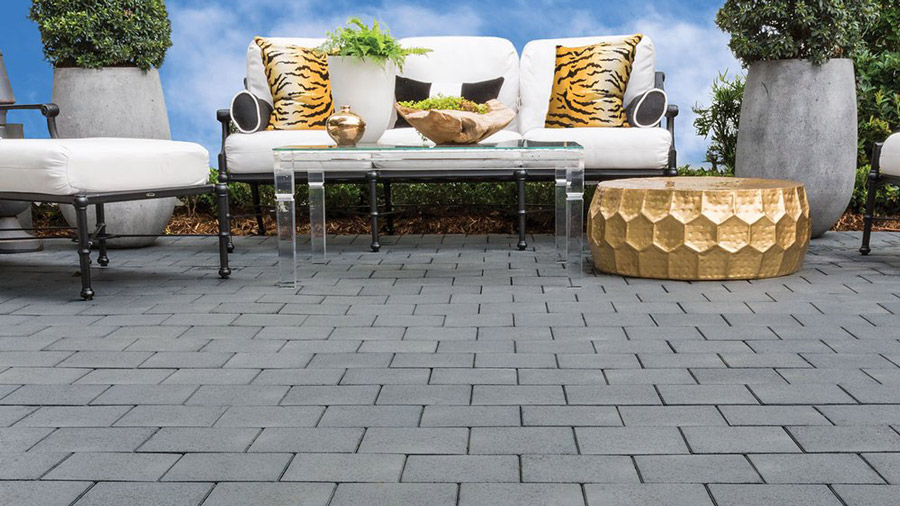
The running bond is another classic paver pattern that mimics the layout of a brick wall with each paver offset from the previous row and matching the row before that.
The result is a little more visual intrigue than a classic stack bond pattern (where each row would be identical, without the offsetting seams). It's also stronger, with each paver held in place by six different pavers around it.
How To Install A Running Bond Pattern
For a running bond layout, you'll need to start with your grids staggered, as shown in the image below on the left. This makes sure that your pavers overlap multiple grids to keep everything locked in place. You can cut off the top portion of the extending grid and use it at the bottom of your layout.
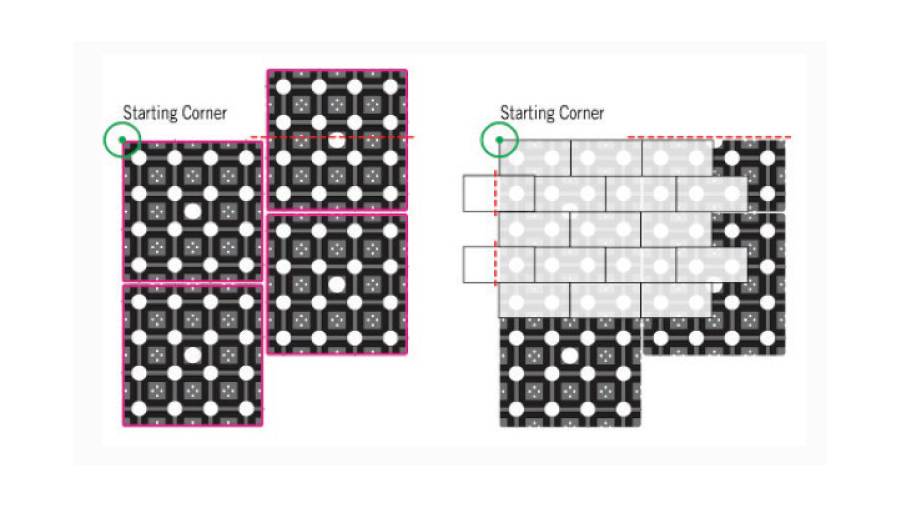
You can also cut the pavers in half where they extend past the first grid. Once again, you can save material by using the other half of the paver on the other side of your pattern.
Block Lattice Paver Pattern
Now, we'll leave the more traditional laying patterns to look at a few more complex options. These next three will all combine rectangular patterns with the larger 8-inch by 8-inch square pavers.
A block lattice pattern features a large square paver prominently in the middle, framed by smaller rectangular and square pavers.
How To Install A Block Lattice Pattern
Your installation grids can sit square for this pattern, without needing any trimming or offsetting. Start with a big square in the corner, then surround it with rectangles on the long sides and small squares at the corners:
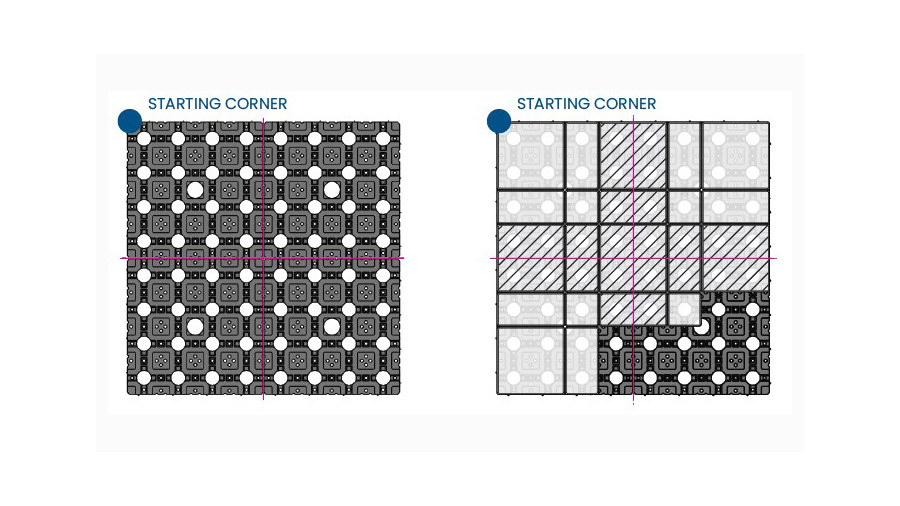
By the time you get to the next row of large squares, they'll straddle the boundary between grids, locking everything together.
If you're installing a block lattice layout, you'll want to buy and use this ratio of paver shapes:
- 44.4% large square (8x8) pavers
- 11.1% small square (4x4) pavers
- 44.4% rectangular 4x8 pavers
You can always give our team a call at 1-888-824-5316 to plan your project and make sure you get the right amount of each shape and color for the look you want.
Soldiered Paver Pattern
A soldiered pattern is very similar - it's built around a large square paver surrounded by smaller rectangles. But instead of the block lattice aesthetic, which features a lot of joints with four square corners meeting, the soldiered pattern offsets the smaller rectangles to create more of a "swirl" around the large square.
How To Install A Soldiered Pattern
For the soldiered pattern, you'll need to trim your starting grids, cutting them in half on both the top and side of your starting space, as shown in the dotted lines below. (You can use the other halves of the grids at the other end of your space to avoid wasting material).
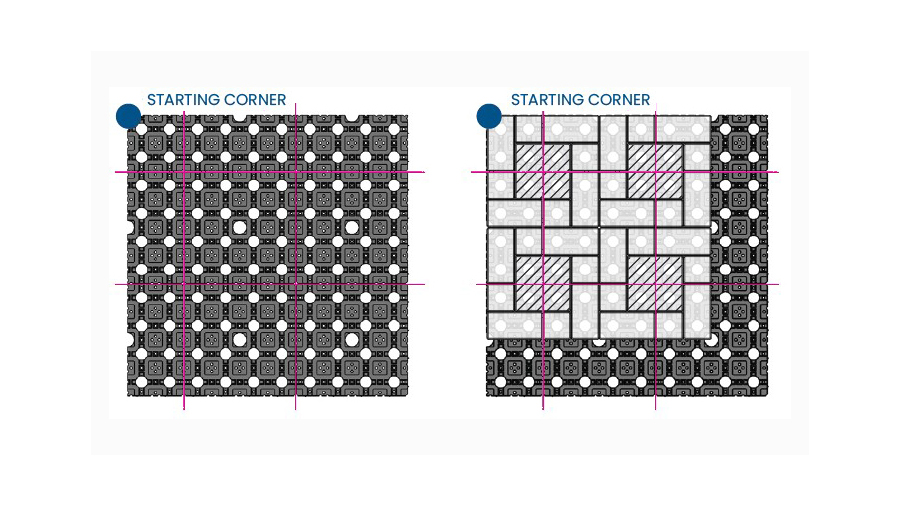
Your first large square tile will overlap the four corners of your starting grids for maximum stability. Then surround the large square tile with a pattern of alternating rectangle and small square tiles.
If you're installing a soldiered layout, you'll want to buy and use this ratio of paver shapes:
- 25% large square (8x8) pavers
- 25% small square (4x4) pavers
- 50% rectangular 4x8 pavers
You can always give our team a call at 1-888-824-5316 to plan your project and make sure you get the right amount of each shape and color for the look you want.
Plainweave Paver Pattern
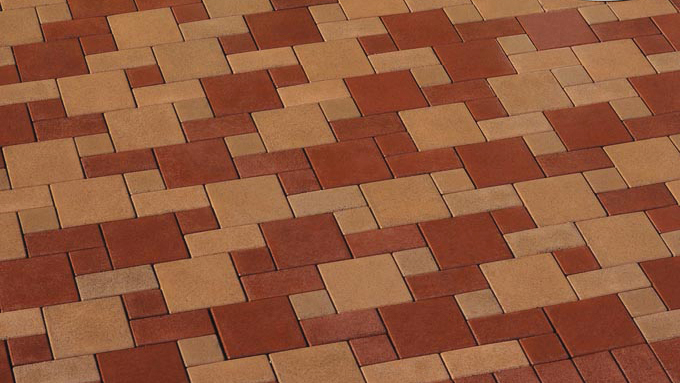
The plainweave pattern looks complex but isn't any more difficult that the other paver laying patterns we've hit so far. You can alternate colors for a look that's especially eye-catching.
How To Install A Plainweave Pattern
For the plainweave layout, there's no need to cut down any installation grids. Just set them up in a square as shown below:
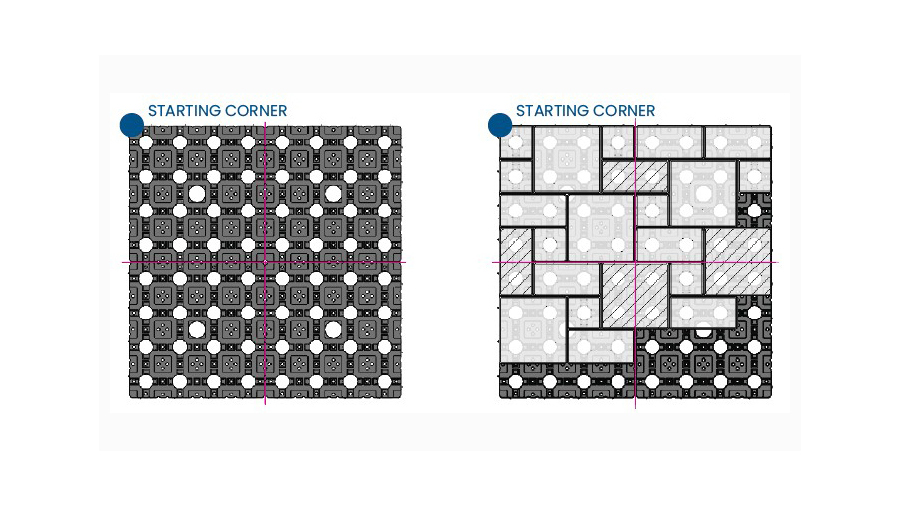
The whole pattern is a series of long, angled rows of the large squares, using the smaller pavers to fill in around those angled rows. One advantage of this pattern is that you'll overlap multiple grids with a range of different tiles to hold things together from all angles.
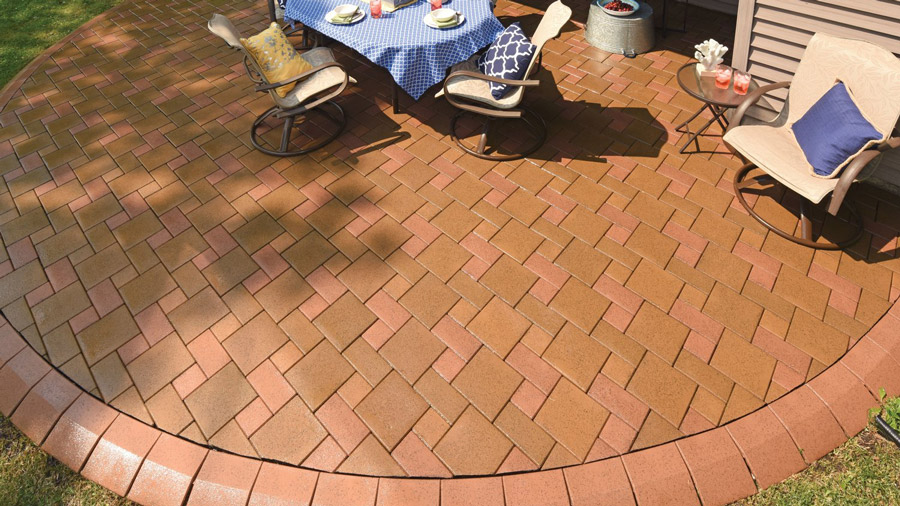
If you're installing a plainweave layout, you'll want to buy and use this ratio of paver shapes:
- 57.1% large square (8x8) pavers
- 14.3% small square (4x4) pavers
- 28.6% rectangular 4x8 pavers
You can always give our team a call at 1-888-824-5316 to plan your project and make sure you get the right amount of each shape and color for the look you want.
Shop PaversOther Paver Patio Design Ideas
Beyond your choice of paver laying patterns, there are other ways to personalize your new resurfaced deck or patio, too!
Check out some of our favorite additional customization options:
Use Bullnosing For Clean Edges
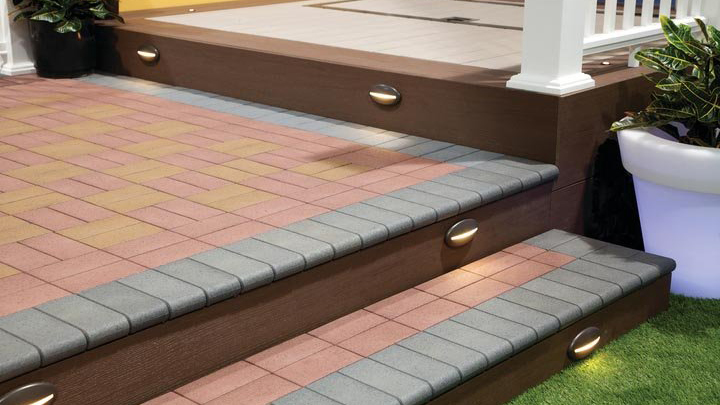
You can give the edges of your space a nice clean finish with bullnose border pavers:
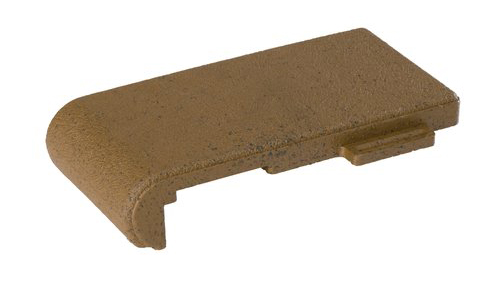
These rounded-off border pavers are perfect for the boundaries of your patio, or for sleek nosing on steps:
Cut Tiles For Curves Or Unique Shapes
The great part about using Aspire Pavers is that the recycled material is incredibly easy to cut and trim. If your space isn't a perfect square or rectangle, you can fill the entire area by cutting curves or notches into your pavers:

We recommend using a jigsaw or miter saw and a wood-ripping blade with a low tooth count to create the cleanest cuts.
Combine Patterns For More Complex Looks
Instead of sticking with one paver pattern, you can combine multiple patterns into the same space for an even more eye-popping look.
Check out some of these amazing combination patterns below:
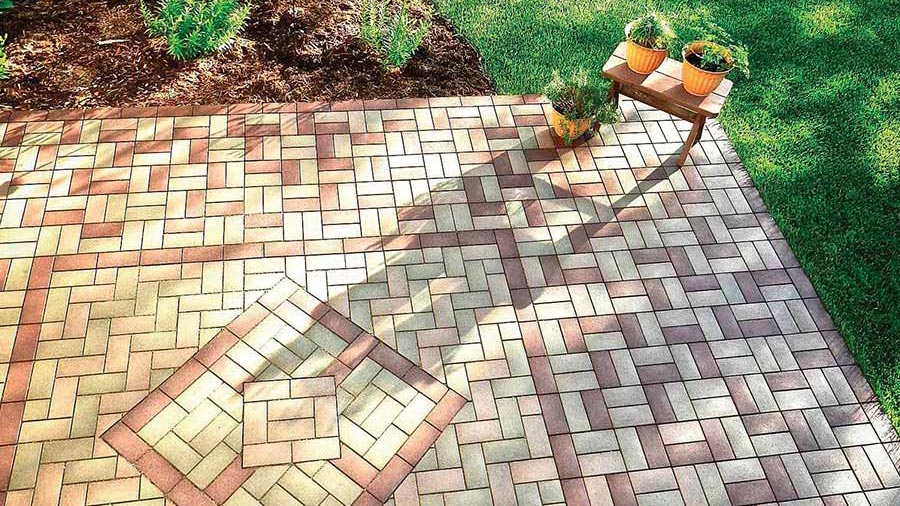
This detailed patio features a basketweave pattern around the outside, with a herringbone pattern within and then a few decorative square and diamond layouts inside that.
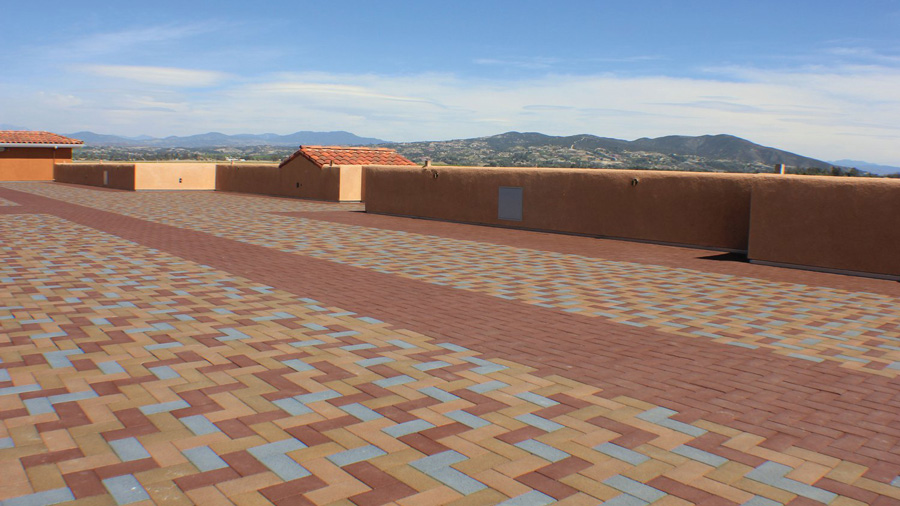
This rooftop deck is mostly made up of a bright, multicolored herringbone pattern, but creates a distinct walkway by breaking the herringbone pattern with stretches of a single-color herringbone.
To plan a more complex pattern like these, we'd recommend giving our team a call at 1-888-824-5316. We've got a full staff of experienced deck project planners available by phone to help you plan your space and make sure you get everything you need to complete the project without needing to wait on extra materials.


